

S’more bars are what happen when you take the campfire out of s’mores and let the oven do the work instead. Four ingredients: graham cracker crumbs, butter, chocolate chips, and marshmallows. That’s the whole list. No eggs, no flour, no vanilla, no measuring spoons needed for anything fancy. You press a crust, pile on chocolate and marshmallows, bake, and wait for it to cool. The waiting is the hardest part.
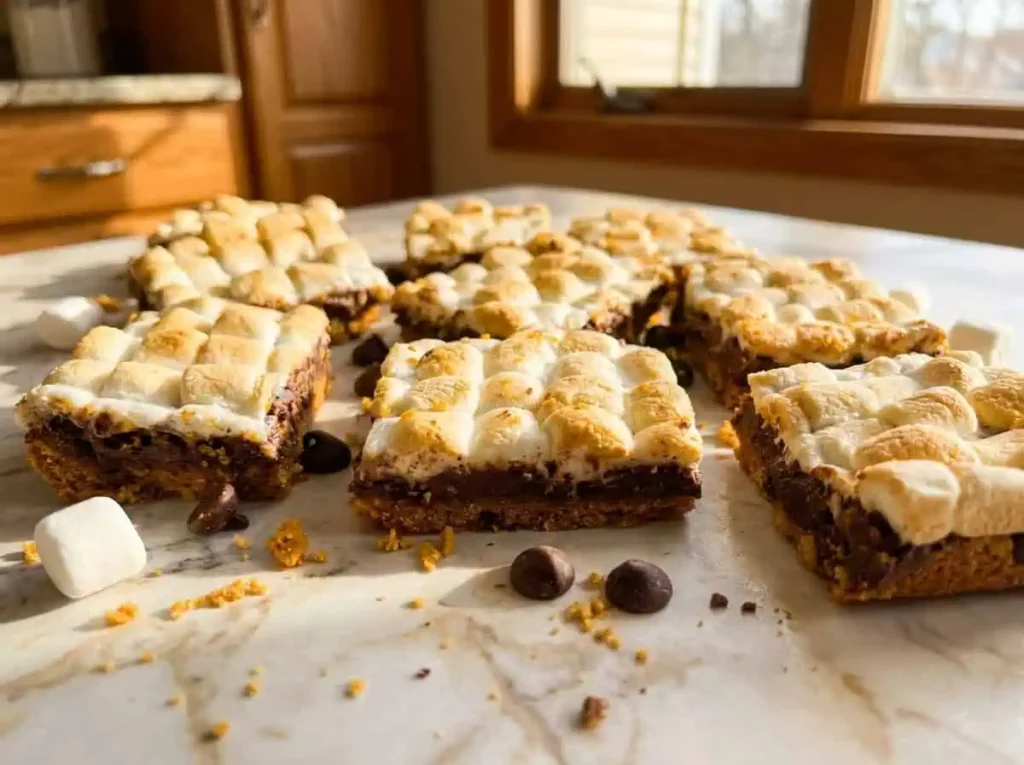
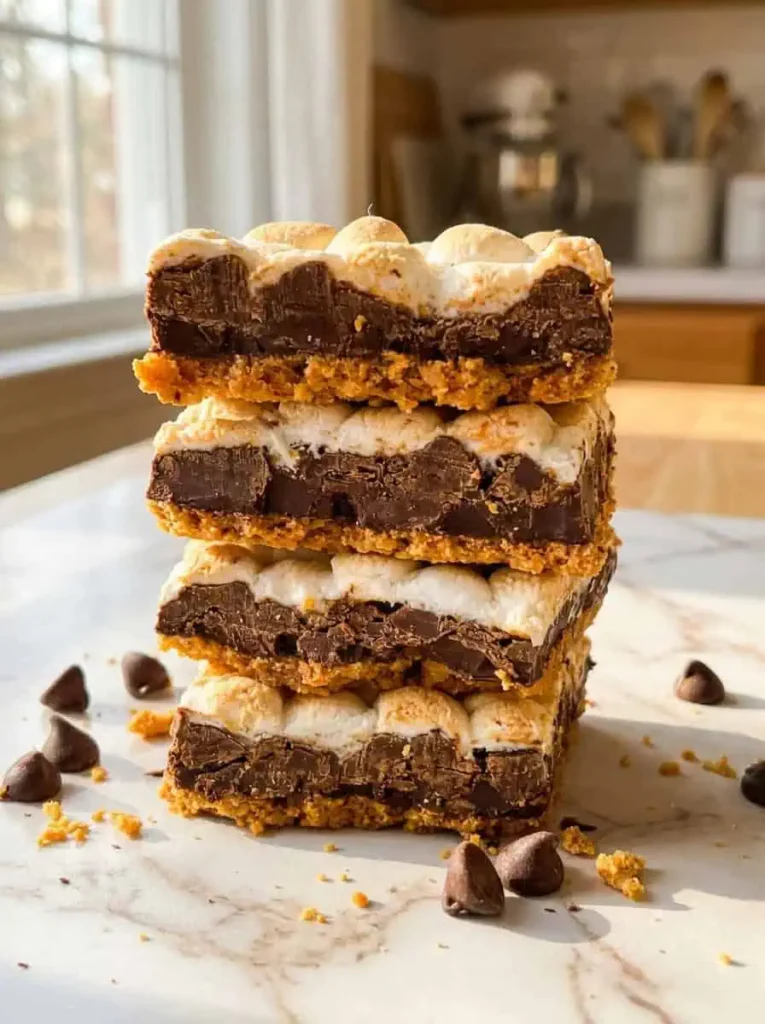
I make these when I want something that tastes like a summer night but don’t feel like standing outside holding a stick over a fire. They scratch the same itch. The crust is buttery and crisp, the chocolate melts into a solid layer underneath, and the marshmallows toast golden and gooey on top. Every bite has all three textures, which is more than you can say for an actual s’more where half the marshmallow ends up on your sleeve.
The crust is just two ingredients
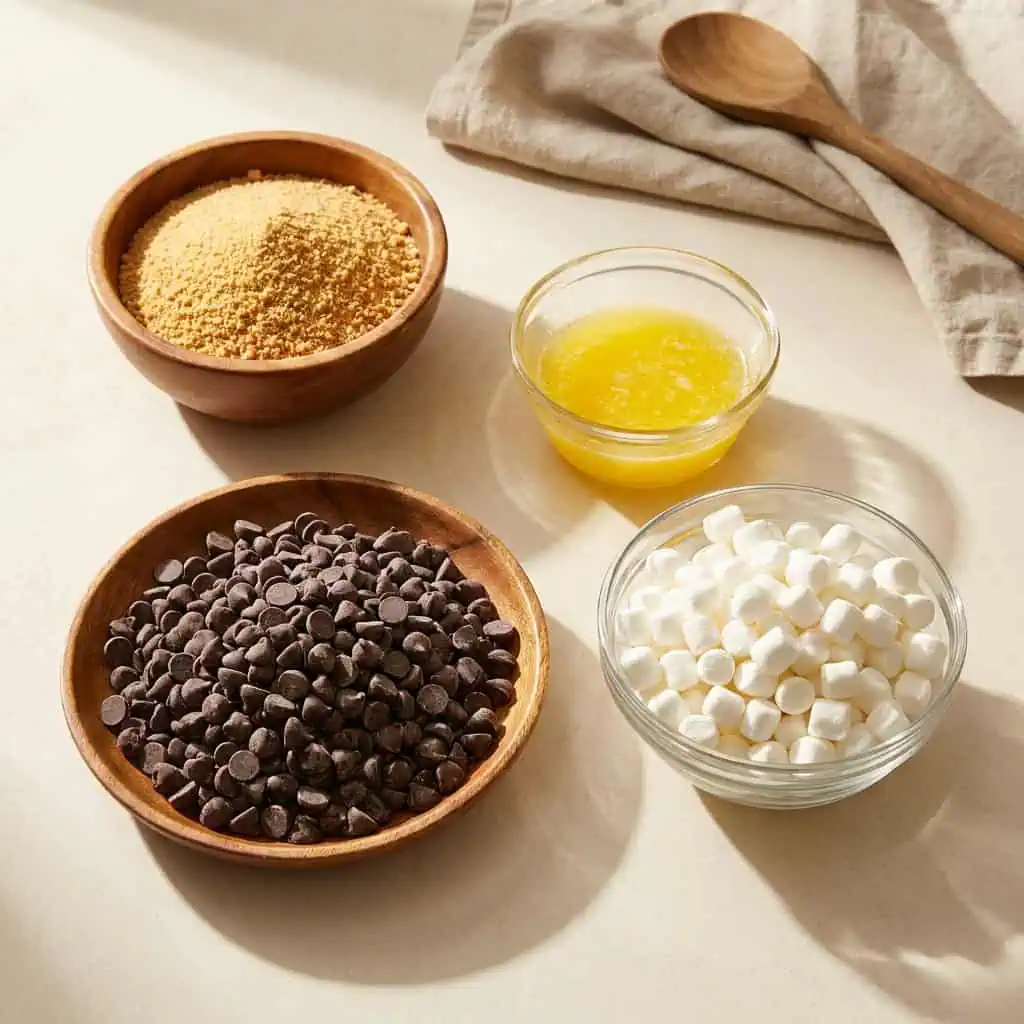
Two cups of graham cracker crumbs mixed with half a cup of melted butter. That’s it. You can crush whole graham crackers yourself in a zip bag with a rolling pin or buy the pre-crushed crumbs, and honestly the pre-crushed ones are more consistent. You want fine, even crumbs so the crust holds together in one piece when you slice the bars later.
Press the mixture into a greased 9×13 pan, and press it firmly. Get the bottom of a measuring cup and push down hard, working it up the sides a little too. A loose crust crumbles when you cut, and then you’re eating s’more rubble instead of s’more bars. Eight minutes in the oven at 350 sets the crust so it’s solid but not overbaked. It should look barely golden when you pull it out.
Layering matters more than you’d think
Chocolate chips go on the hot crust first, in an even layer. The residual heat from the crust starts softening them immediately, which is what you want. They’ll melt fully in the second bake and form a smooth chocolate layer between the crust and the marshmallows. If the chips are unevenly distributed, you get bars with chocolate pockets and bare spots, so take ten seconds to spread them out.
Marshmallows go on top of the chocolate. Mini marshmallows are the move here because they cover the surface evenly and toast more uniformly than large ones you’d have to cut. Pour them on and nudge them into a single layer. Some gaps are fine; the marshmallows expand as they bake.
Back in the oven for twenty minutes. You’re watching the marshmallows, not the clock. They puff up, merge together, and then the tops start turning golden brown. A few dark spots are good and taste like a campfire. Completely black means you’ve gone too far, so check around the fifteen-minute mark if your oven runs hot.
The cooling step you can’t skip
Let the pan cool completely on the counter, then move it to the fridge. This is not optional. The chocolate needs to set back into a solid layer and the marshmallow needs to firm up, or you’ll try to cut them and pull out a stringy, melted mess that tastes fine but looks like an accident. An hour in the fridge is usually enough. Two hours if you have the patience.
Cut them with a sharp knife, and run the blade under hot water between cuts. The warm knife slides through the chocolate and marshmallow cleanly instead of dragging and tearing. Wipe the blade, heat it again, make the next cut. Six to eight minutes of careful slicing gives you clean, bakery-looking bars from a recipe that took almost no effort to assemble.
Where these fit in my kitchen
The first time I had a s’more was as an adult, sitting around a fire pit with people who couldn’t believe I’d never had one. Where I grew up, the closest thing was grilling flatbread with chocolate and honey, which honestly isn’t far off. The idea of melting marshmallow and chocolate between two crackers over a fire felt both absurdly simple and a little bit magic. These bars capture that same feeling with none of the sticky fingers and dropped marshmallows.
I bring them to gatherings because they’re easy to transport (the fridge sets them firm enough to stack), they feed a crowd from one pan, and nobody has ever said no to one. Kids treat them like candy. Adults treat them like dessert. Both are correct.
Keeping and adapting
Store them in a sealed container in the fridge for up to five days, though they rarely last that long. They’re best slightly cold, when the chocolate is firm and the marshmallow is chewy rather than gooey. You can eat them at room temperature too, but they’re messier and the bars lose their clean edges.
If you want to push them further, drizzle melted peanut butter over the marshmallows before baking, or swap half the chocolate chips for peanut butter chips. A sprinkle of flaky sea salt on the marshmallows right after they come out of the oven does something genuinely good against all that sweetness. But the original four-ingredient version is the one I make most. Simple works. Serves about 6, or more if you cut smaller squares.
Take them to the campfire anyway
If you’re actually going camping, these travel better than raw s’more ingredients. Bake them at home, chill, cut, and stack them in a container with parchment between layers. They hold up in a cooler for a couple of days and taste like a s’more without anyone needing to find a roasting stick. A campfire dessert you made before you left the house.
S’more Bars
Description
S'more bars made with graham cracker crumbs, butter, chocolate chips, and marshmallows. A crisp crust, melted chocolate middle, and toasted marshmallow top, all from the oven.
Ingredients
Instructions
-
Preheat the oven to 350 degrees Fahrenheit. Grease a 9x13 inch pan with cooking spray.
-
Mix together the graham cracker crumbs and melted butter until evenly combined.
-
Press the mixture firmly into the bottom of the pan and slightly up the sides. Use the bottom of a measuring cup to press it down evenly.
-
Bake the crust for 8 minutes until barely golden.
-
Remove from the oven and sprinkle the chocolate chips in an even layer over the hot crust, followed by the mini marshmallows in a single layer.
-
Bake for 20 minutes until the marshmallows are puffed and golden brown on top.
-
Let the pan cool completely on the counter, then refrigerate until the chocolate and marshmallow are fully set, at least 1 hour.
-
Cut into bars with a sharp knife run under hot water between cuts. Serve..
Nutrition Facts
Servings 6
- Amount Per Serving
- Calories 28kcal
Note
Press the crust firmly or the bars will crumble when cut. Let the pan cool completely and refrigerate for at least 1 hour before slicing. For clean cuts, run the knife under hot water and wipe between slices. No nutrition data was provided for this recipe.