



A good hamburger is not complicated, but it has opinions. The meat matters, the fat percentage matters, the seasoning goes on at the last possible moment before the grill, and the thumb indentation in the center is not optional. Get those four things right and a hamburger from your backyard grill is better than most of what you’d order at a restaurant, because it’s hot, it’s yours, and you made it to your own standard.
This recipe uses 80/20 ground chuck, which is the right ratio for a juicy burger that stays moist through the cook without being greasy. A six-spice dry rub goes on just before the patties hit the grill. Twenty-five minutes from start to table, serves six.
Ground chuck over ground beef
Ground chuck comes from the shoulder and has a higher fat content and more connective tissue than generic ground beef, which means more flavor and more moisture as it cooks. The 80/20 label means 80 percent lean, 20 percent fat, and that 20 percent is what keeps the burger from being a dry hockey puck at 160 degrees internal temperature.

If you can only find lean ground beef, add a tablespoon of olive oil to the meat before forming patties, or mix in some finely chopped bacon. The fat needs to be there from the start because once the burger is formed and on the grill, there’s no adding it. A combination of 60 percent ground chuck and 40 percent ground brisket is the version worth trying if your butcher will grind it for you. Brisket brings a richness and depth that straight chuck doesn’t have.
The seasoning blend
One and a half teaspoons of freshly ground black pepper, one teaspoon of salt, two teaspoons of paprika, half a teaspoon of brown sugar, and a quarter teaspoon each of garlic powder, onion powder, and cayenne. Mix it together in a bowl. The brown sugar is there for the same reason it appears in barbecue rubs: it encourages a crust to form during the sear and adds a slight sweetness that plays against the salt and pepper without reading as sweet in the finished burger.
Hold the seasoning until just before the patties go on the grill. Salt draws moisture out of meat, and if the seasoning goes on too early it starts pulling juice to the surface that then drips away instead of staying in the patty. Season at the last moment and that moisture stays where you want it.
Forming the patties correctly
Divide the meat into six equal portions and handle each one as little as possible. Overworked burger meat becomes dense and tough because handling develops the proteins and compresses the fat. Shape each portion into a patty about half an inch thick and wider than the bun, because the burger shrinks during cooking and you want it to fit the bun when it comes off the grill, not leave it hanging over.
Press a shallow indentation into the center of each patty with your thumb. This is the step most home cooks skip and then wonder why their burgers puff up into a dome in the middle. The meat contracts as it cooks and without the indentation the center rises while the edges stay flat. The thumb press keeps the patty flat so it cooks evenly and sits properly on the bun. If you’re doing a lot of prep ahead, some cooks place a small ice cube in each indentation to keep the center cold and moist until grill time.
On the grill
Medium-high heat, preheated and ready. Sprinkle the seasoning over both sides of the patties right before they go on, indent side up. Close the lid and cook for three to four minutes, until the bottom is seared and you can see juices starting to pool on the top surface. That pooling of juice is your signal that the patty is ready to flip. Flip once, close the lid, and cook another three to four minutes.
160 degrees internal temperature for medium doneness. A meat thermometer is the honest answer here; color and time are unreliable indicators. In the last minute of cooking, lay a slice of cheese over each patty and let it melt before you pull them. Pull the burgers to a plate and rest for a few minutes before assembling. The rest is short but meaningful: the juices redistribute rather than running out the moment you bite.
For stovetop: a cast-iron skillet, medium-high, with a thin coat of oil. Three to five minutes per side. Same internal temperature target.
The cheese question
American cheese melts better than almost any other cheese because of how it’s processed: the emulsifying salts keep the fat and protein from separating at heat, giving you a smooth, even melt that coats the patty rather than pooling in puddles. Get it sliced fresh from the deli counter rather than the individually wrapped squares, which have additional additives and a different texture. If you have a preference for something sharper, a good cheddar or pepper jack works, just accept that it won’t melt quite as smoothly.
Building the burger
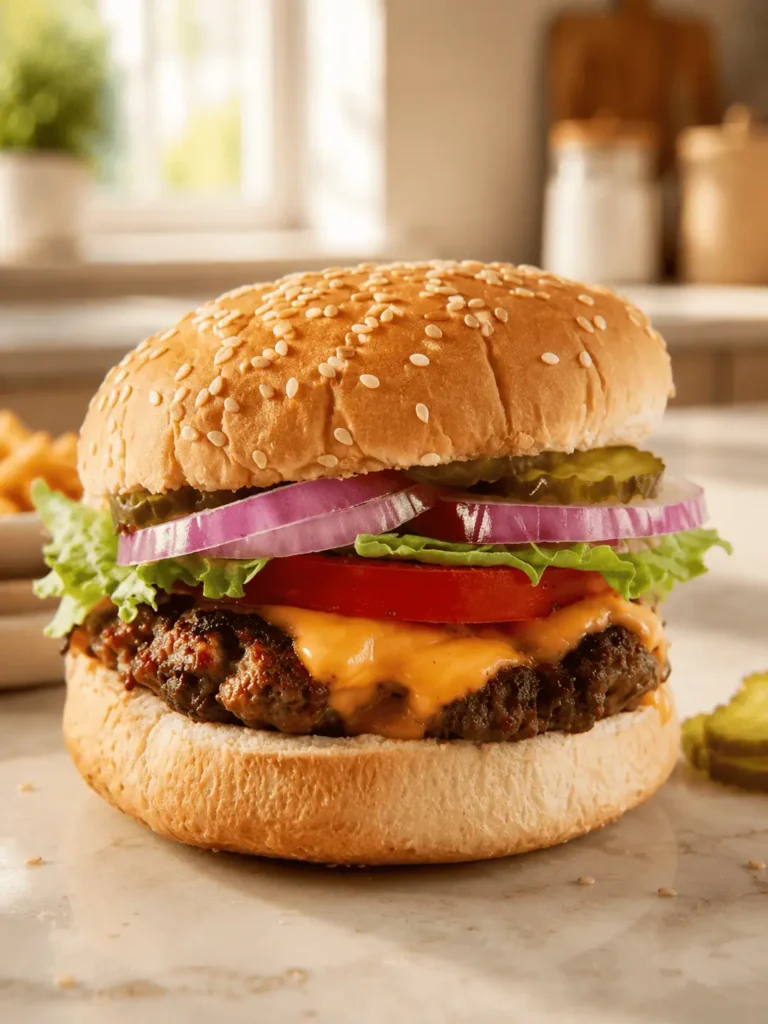
A toasted bun holds up better to the juices and the weight of the toppings than a soft untoasted one. Everything else is personal: lettuce, sliced tomato, thin-sliced onion, pickles, condiments. The order matters slightly; most people put the condiment on the bun first so the lettuce and tomato don’t slide. But the burger is the point of the plate and the toppings are its supporting cast. Serves 6. Patties can be formed and refrigerated for one to two days before cooking, or frozen for up to three months.
The smash burger variation
If you want a thinner, crispier-edged burger, use a smaller ball of meat per patty, about two ounces, and smash it flat with a heavy spatula the moment it hits the hot griddle or cast-iron. Cook for two to three minutes until the edges are lacy and crispy, flip once, add cheese, and assemble. The smash method gives you a different burger entirely: less about the interior and more about the caramelized crust. Same meat, same seasoning, completely different eating experience.
Homemade Hamburgers
Description
Juicy grilled burgers made with 80/20 ground chuck and a six-spice dry rub. The thumb indentation and late seasoning are the two techniques that make the difference.
Ingredients
Instructions
-
Combine all the spices and sugar in a small bowl to make the burger seasoning. Set aside.
-
Divide the ground chuck into 6 equal portions. Gently shape each into a patty about 1/2 inch thick and slightly wider than the buns. Do not overwork the meat.
-
Press a shallow indentation into the center of each patty with your thumb. Cover and set aside.
-
Preheat the grill to medium-high. Just before cooking, sprinkle the seasoning over both sides of the patties.
-
Place the patties indent-side up on the hot grill. Close the lid and cook for 3 to 4 minutes until the bottom is seared and juices are pooling on top.
-
Flip once. Cook another 3 to 4 minutes, until the internal temperature reaches 160 degrees Fahrenheit. Add a cheese slice on top of each patty in the last minute of cooking.
-
Remove from the grill and rest for a few minutes. Serve on buns with desired toppings..
Nutrition Facts
Servings 6
- Amount Per Serving
- Calories 497kcal
- % Daily Value *
- Total Fat 30g47%
- Saturated Fat 12g60%
- Trans Fat 1g
- Cholesterol 98mg33%
- Sodium 854mg36%
- Potassium 587mg17%
- Total Carbohydrate 26g9%
- Dietary Fiber 2g8%
- Sugars 5g
- Protein 29g58%
- Vitamin A 2798 IU
- Vitamin C 13 mg
- Calcium 225 mg
- Iron 4 mg
* Percent Daily Values are based on a 2,000 calorie diet. Your daily value may be higher or lower depending on your calorie needs.
Note
Use 80/20 ground chuck for best flavor and moisture. Season just before grilling, not when forming the patties. Press a thumb indentation in each patty to keep it flat during cooking. Use a meat thermometer; 160 degrees F is medium.